

Do nature journal drawing skills always seem just a bit out of reach for you? You’ve always wanted to try your hand at nature journaling. You love looking at all the examples you see online. But even from way over here, I can hear the little voice in your head. It says to you, ‘I can’t draw. I just wasn’t born with that talent. I envy those who can draw.’ I’m going to let you in on a little secret.
Really. Lean closer.
Yes, you can draw. You can draw!
Despite what you’ve been told or what you’ve thought in the past, drawing is not a magical talent bestowed on the few. Anyone can learn to draw. Drawing is a skill and a skill can be learned so; in honor of International Nature Journaling Week, we’re going to get started with an easy little drawing skills tutorial.
Mindset: The First Drawing Skill for Nature Journaling
You didn’t see that one coming, did you?
In order to be successful at any new endeavor, we must first address that darned ‘little voice’ in our heads. From now on, we’re going to argue with it. When it tells us, ‘I can’t draw’, you’re going to counter with, ‘I can’t draw, . . . yet.’ That one tiny word has the power to change your world! Try it.
Tools: The Second Skill for Your Nature Journal
You’ll need:
A writing instrument -- pencil, pen, marker (whatever you have on hand)
Paper
Gotcha! You thought I was going to send you to an art store for a big list of specific art supplies, didn’t you?!
If you already have the supplies, by all means use them. The point, however, is that you don’t need to have any special supplies or spend a bunch of money to participate in nature journaling! Nature journaling is for everyone!
Shapes: Our Third Drawing Skill for Successful Nature Journaling
You need to be able to draw 3 basic shapes in order to sketch what you may find when you’re out nature journaling.
Circle
Triangle
Rectangle
Everyone can draw the three basic shapes!
Form: Skill Number Four
Now, when you look at the tree across that field or the bird perched in the tree, they aren’t flat like your paper, are they? We need to give our three shapes the illusion of form.
We’re going to turn our circle into a sphere, our triangle into a cone, and our rectangle into a cylinder using value – or dark and light areas.
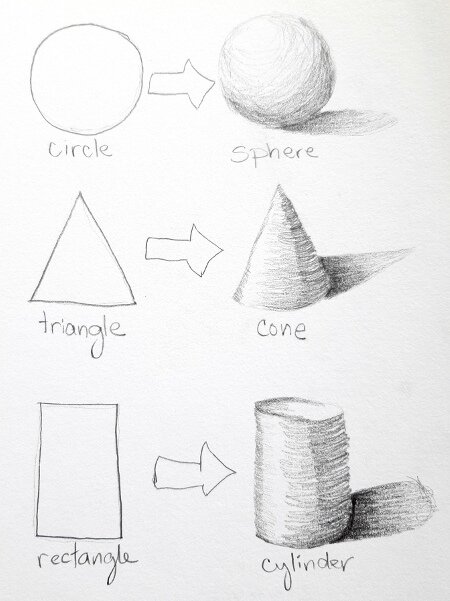
Look closely at the examples. Notice that the lines creating the darker shadowed areas follow the contour of the shape. This helps create the illusion of depth – the ‘roundness’ of the shape.
The darkest areas are those that are furthest away from the light. The lightest areas are those spots that the light-source is hitting directly.
Putting It All Together: Drawing Skill Number Five
Now let’s put all of the pieces together. You have your mindset in the right place. You have your tools. You can draw the 3 basic shapes. You understand how to make the 3 shapes have form.
The best part? Everything you see in nature can be broken down into those 3 simple shapes!

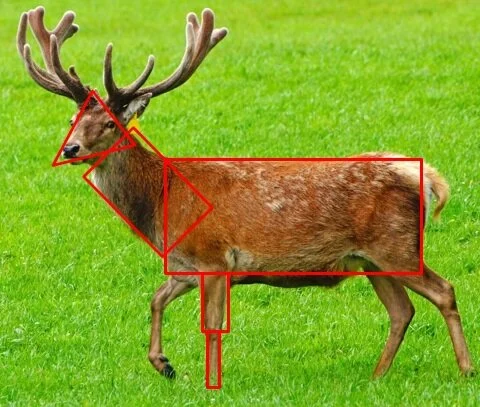
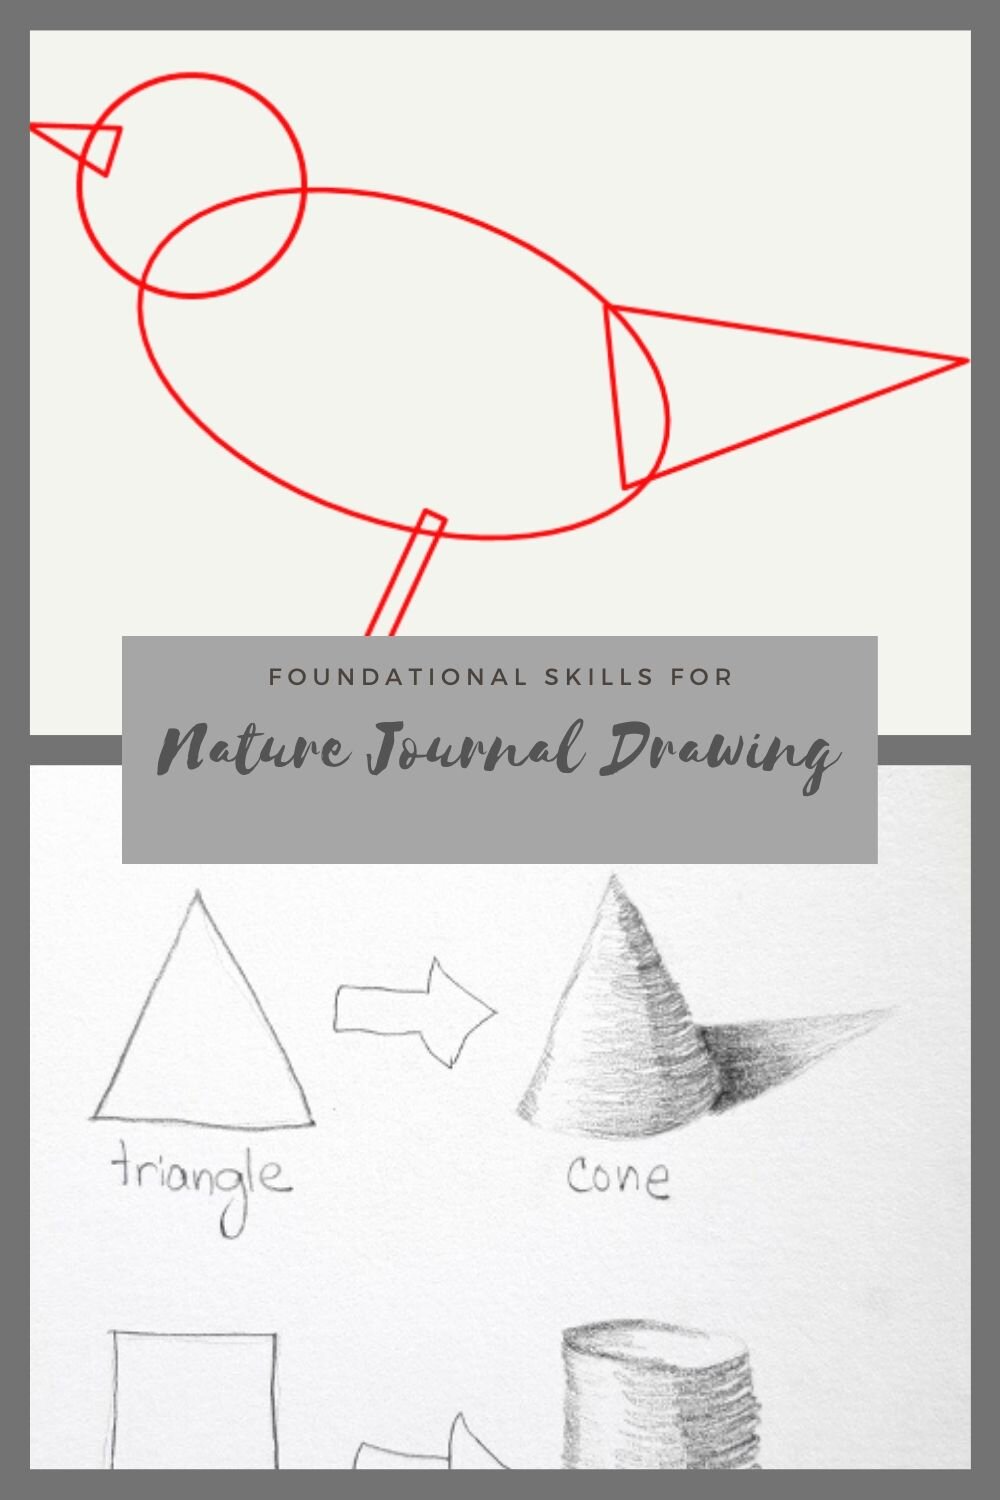
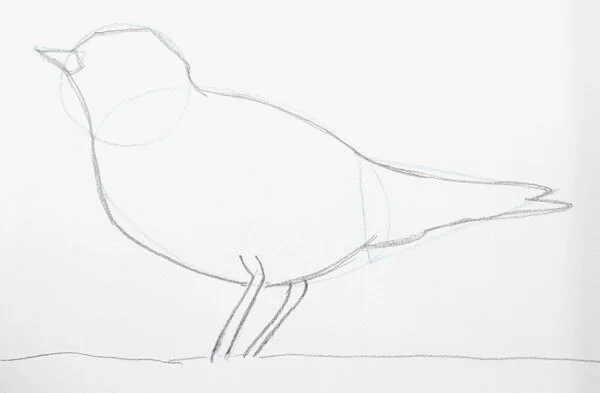
Take a look at these two examples. The bird is composed of a squished circle, a circle, a couple of triangles, and a rectangle. The deer is a series of rectangles plus a slightly triangular head. You can draw those shapes!
This is the stage where you make sure that your proportions are close and your angles are correct.
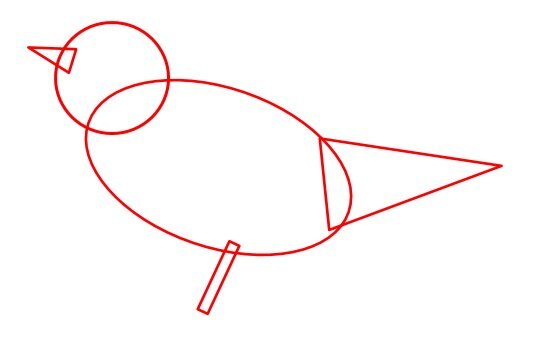
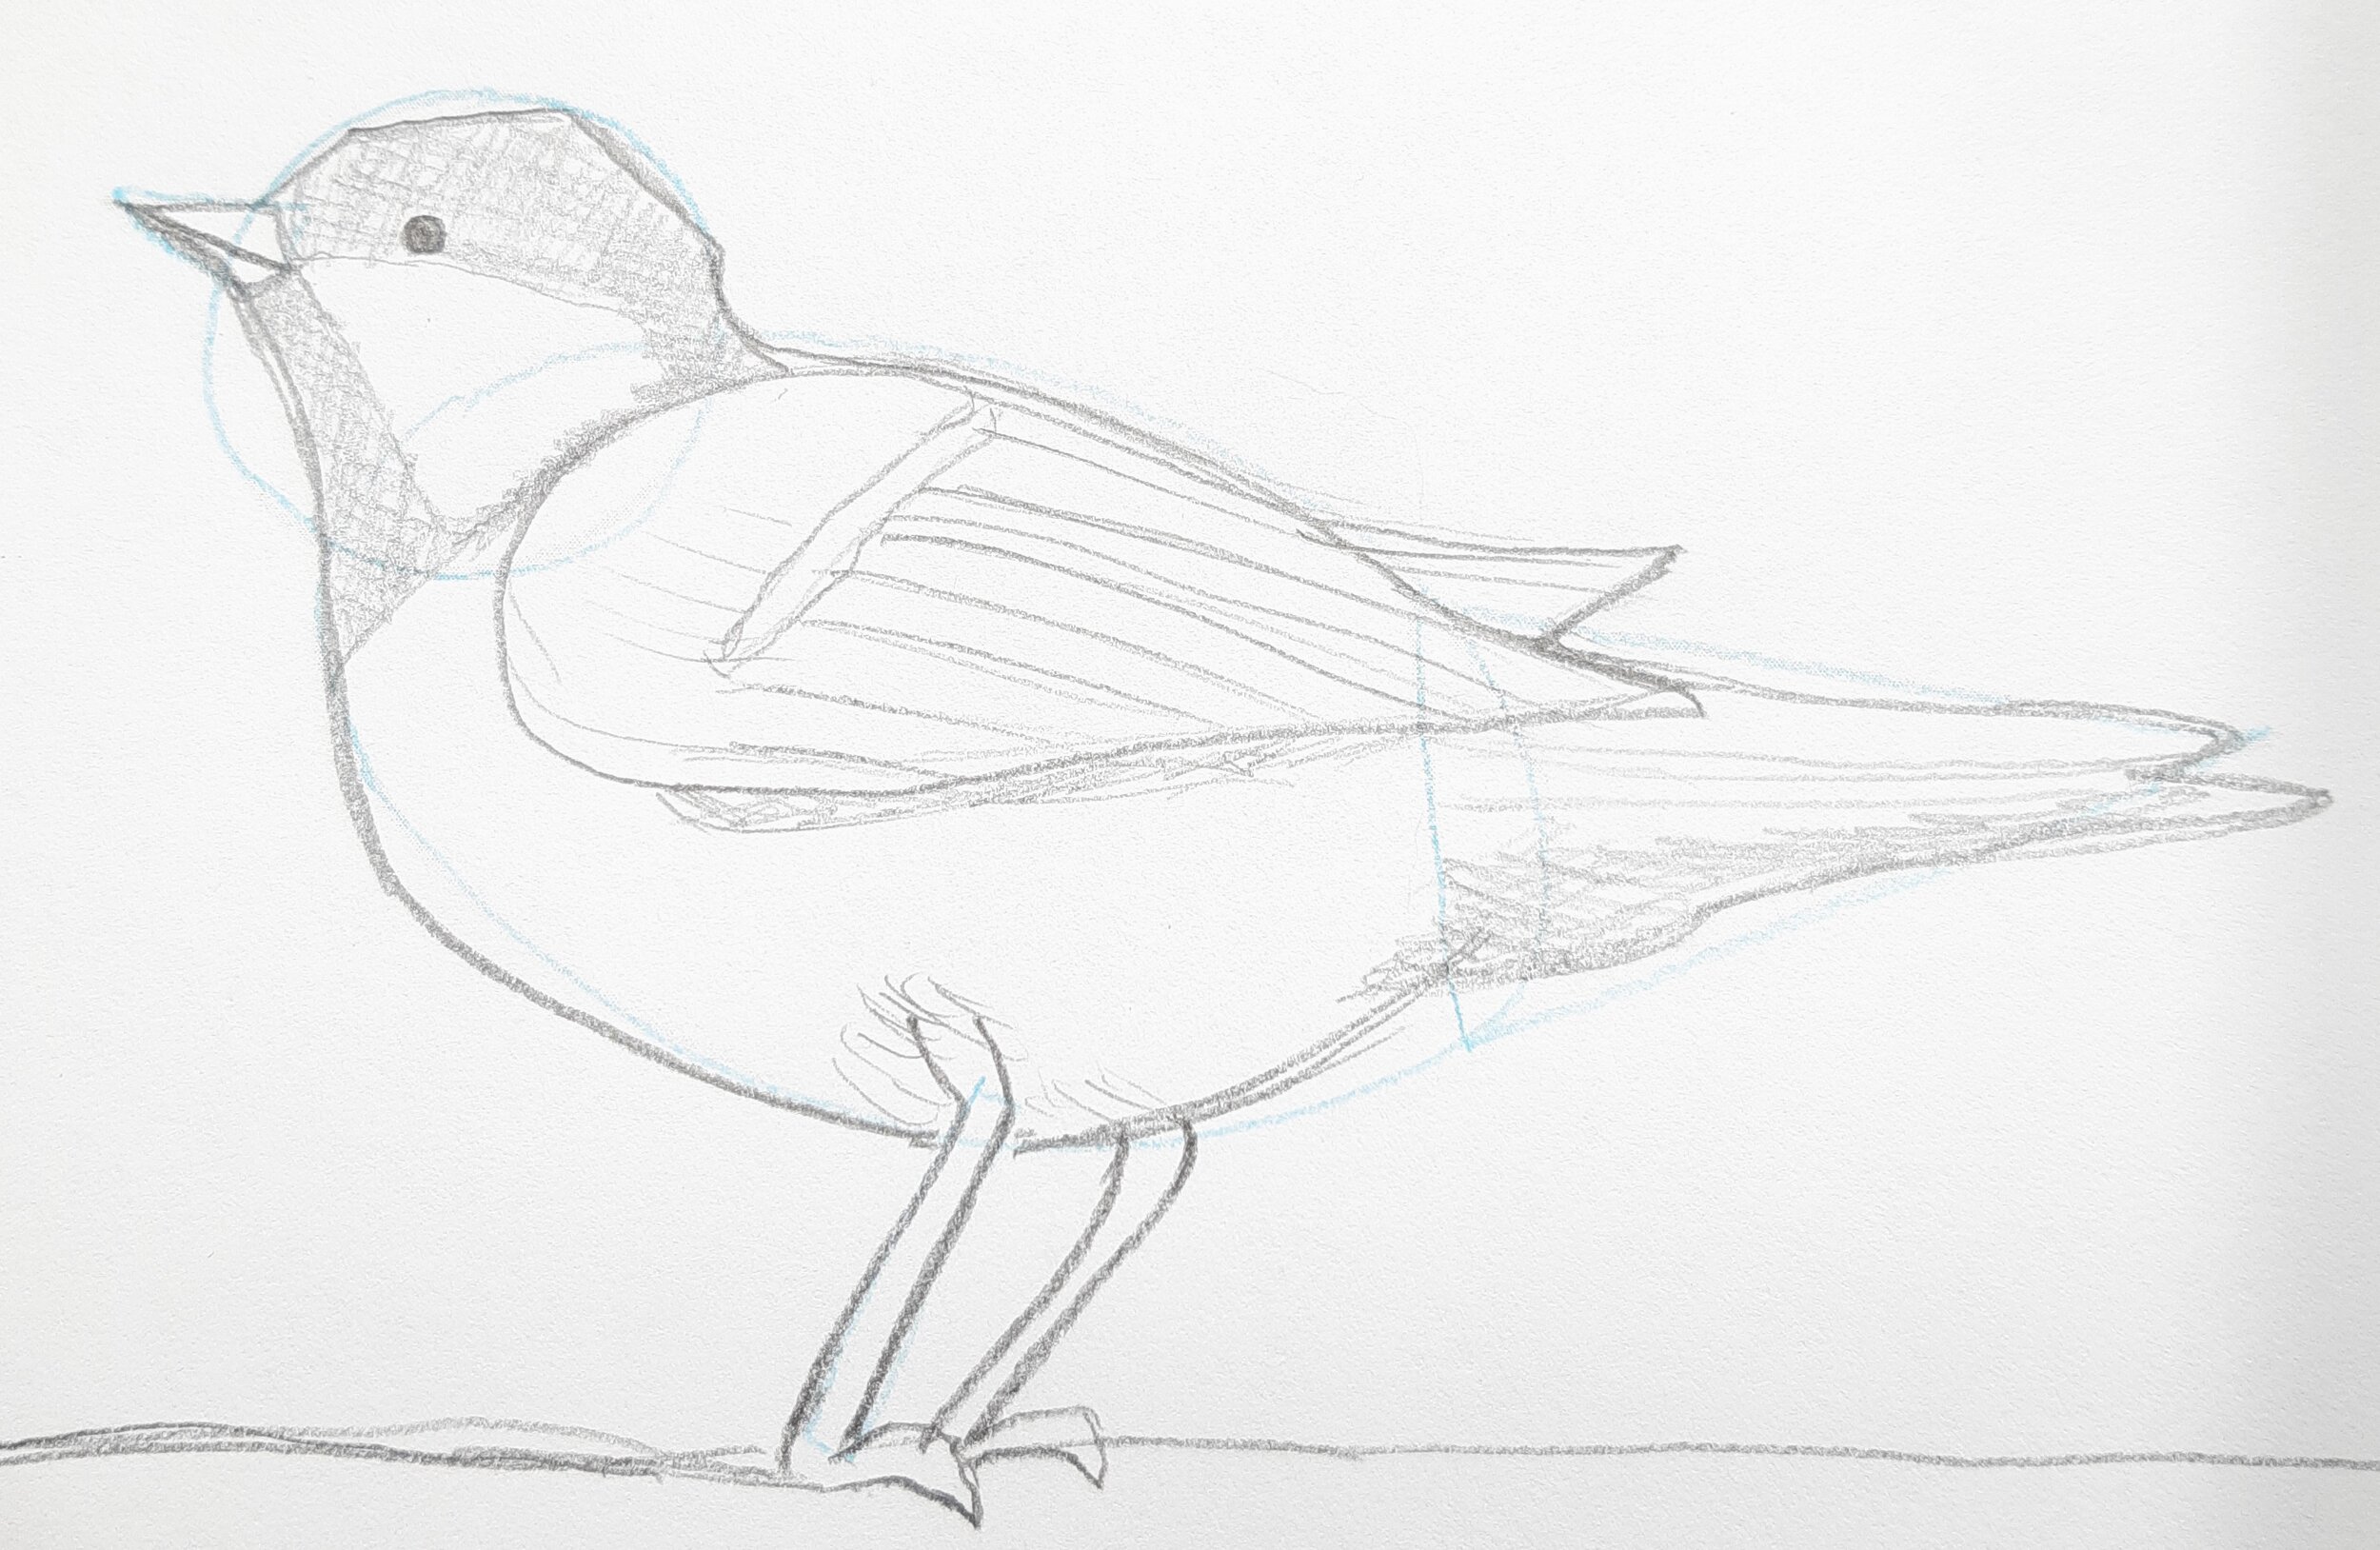
Once you’re happy with that, you begin to refine the outline of your subject. In the bird example, you’ll give her a neck by smoothing out the curves. Puff out her chest just a bit. Round out her tail feathers. Streamline her beak.
Next, add in a few details: give her an eye and a wing; note where her markings are. Add color if you like. And you’re done! It is doable! You can do this.
The Final Drawing Skill is Practice
I truly believe that anyone can learn to draw. I’ve shown you the foundational steps to get you started. Now it’s up to you. It takes practice. Lots of practice. It’s not easy in the beginning to see the shapes in things. You have to work at it. If you’re struggling to see the shapes, here’s a trick you can use.
Get a clear plastic report sleeve from an office supply store (or big box store). Place a photo inside. Trace the shapes on the plastic sleeve with a dry erase marker. Play around with all different types of photos. The more you practice, the faster you’ll get at finding those shapes!
Carry your nature journal with you wherever you go. Don’t be ‘precious’ about its pages. Be kind to yourself. Allow yourself to be a beginner. Compare your sketches to your previous sketches – never to anyone else’s.
Nature journaling is not a competition! If you aren’t falling more in love with nature and enjoying the process of creating nature journal pages, you’re not doing it right! Get outside and sketch something today.
And . . . Happy International Nature Journaling Week!


You can find more Nature Journaling articles and tutorials from Lisa on her website: www.wanderingleavesstudio.com and her YouTube channel: Wandering Leaves Studio.